Today is the day I begin installation of my big metal hand. This is going to be a multiple day process- and hence a multiple post event!
The first order of business here is to dig out some grass/sod. I need to do that, as I have been told that it will be too hard to get the lawn mower underneath of the hand..... sooooooo, I dug out the grass. I will eventually put fine gravel and/or sand on the dirt under there, or the grass will creep in. It isn't a huge chunk of sod, but it is big enough- maybe 6 ft. across and 4 ft. wide. I spent an hour and a half(and a LOT of calories) digging out the sod, transporting it to be "disposed" of, and then finishing edging the rock garden.
The metal mesh hand is what I am going to install in the space next to my rock garden. I want it to look like it is emerging from the ground. It will not be mosaic-ed as I want it to be just concrete. I plan to make something to set in or on the hand. That will be figured out soon.
The space here is cleared of sod, weeded and loosened a bit for the next step, which will be digging the hole for the wrist.
Here is my first guess at the proper size of the dug space under the hand. I needed to go a little farther, it seemed too small. Don't want to have lawn mower issues, after all!
Ah yes, this is better! We are also going to fill in the space to the right of the hand with large rocks, as a finale to that end of the stone fence. The bird bath will be moved.
I laid the hand down to estimate the size of the hole needed for the wrist. That gave me a place to start with the size of the wrist. Next step is to get out the metal working tools and the gloves!
The "completed" hole.
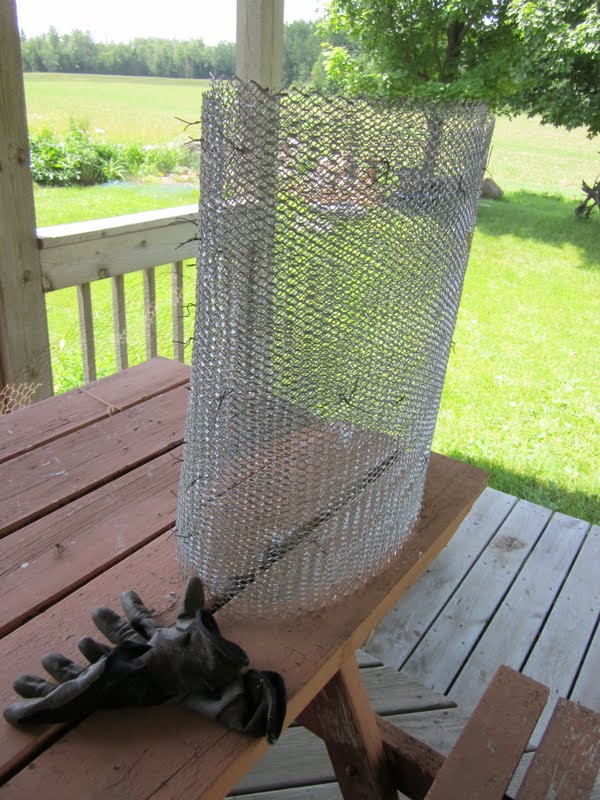
Here is the mesh that I use for the form of the sculptures. This wrist is going to be pretty simple and straight forward. It is going to be rounded at the bottom and more oval at the top to accommodate the shape of the hand. It has to have a double layer of mesh, so the concrete will stay on the metal, and will have some vertical reinforcement inside. That will hopefully support the weight of the hand once it is concreted. I am still considering whether to use rerod or pvc pipe to help the wrist stay rigid.
My favorite metal snips and I!
I am beginning to form the metal into the wrist shape. I decided that this piece of metal was a bit too tall, so I cut 6 inches off one side. I had to tweak the shape of the hole and the wrist. It will be sunk into the ground about 18 inches or so.
After the initial form is bent into shape, it is time to get out the wire and pliers to twist into the metal to hold it in place. They are like little twist ties. The nitrile gloves I have on are imperative for my safety. I have landed in urgent care from an injury during this process, so I don't take chance and always wear these babies. I know they have saved me a quart or two of blood! :)
The wrist in progress. If you look closely you can kind see the stitches that hold it together. After this picture was taken I added some strips of mesh in the inside to add stability and rigidity.
At this point I went into the house for lunch and ran to do some errands, by the time I got home, there were thunderstorms forming! I hope to do more on this tonight.
Next steps include putting the wrist into the ground, mixing up a batch of concrete to secure the wrist into the ground and then attaching the hand to the wrist. I hope to make up that batch of concrete tomorrow!
Good progress is a joy!


It's definitely taking shape, Debi. I'm anxious to see the finished product.
ReplyDelete